

Find a user
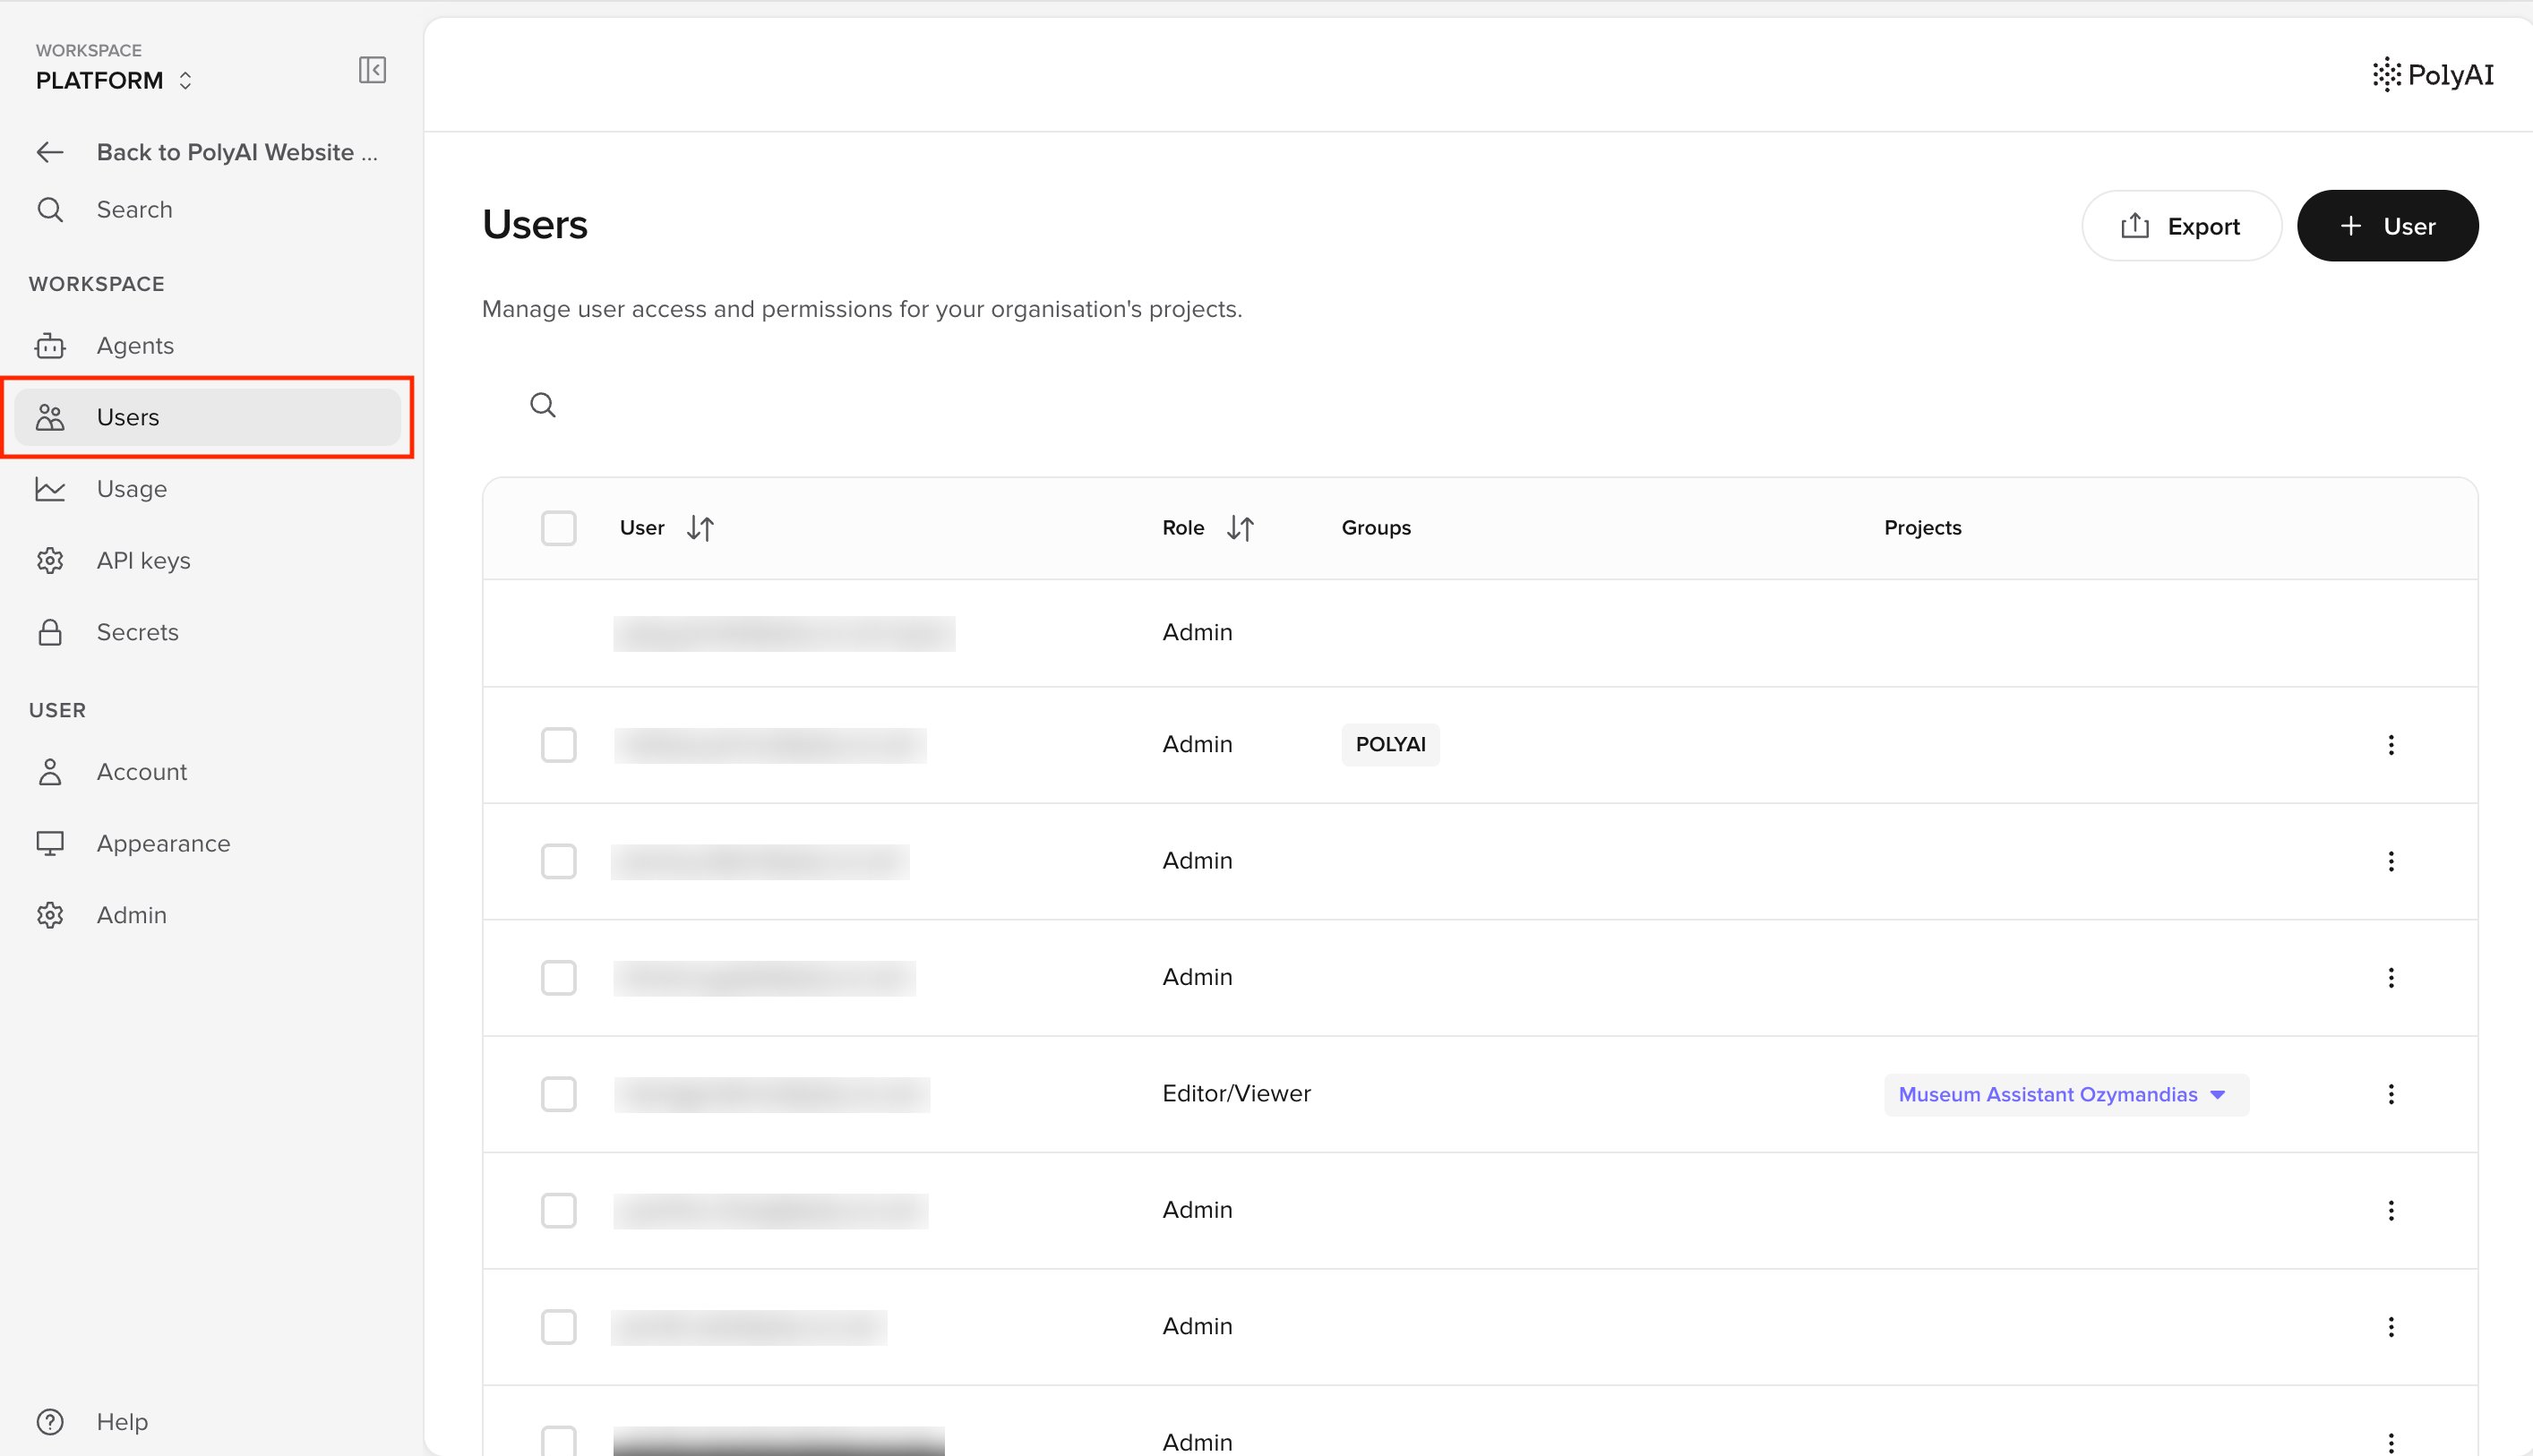
- Type in the search field to filter the list by email address.
- Click the User or Role column header to sort the list.
- The Projects column shows each project that a Member can open. Click a project to see the permission level for each area in that project. Admins have access to every project, so the column is empty for Admins.
Edit a user
1
Open the row menu
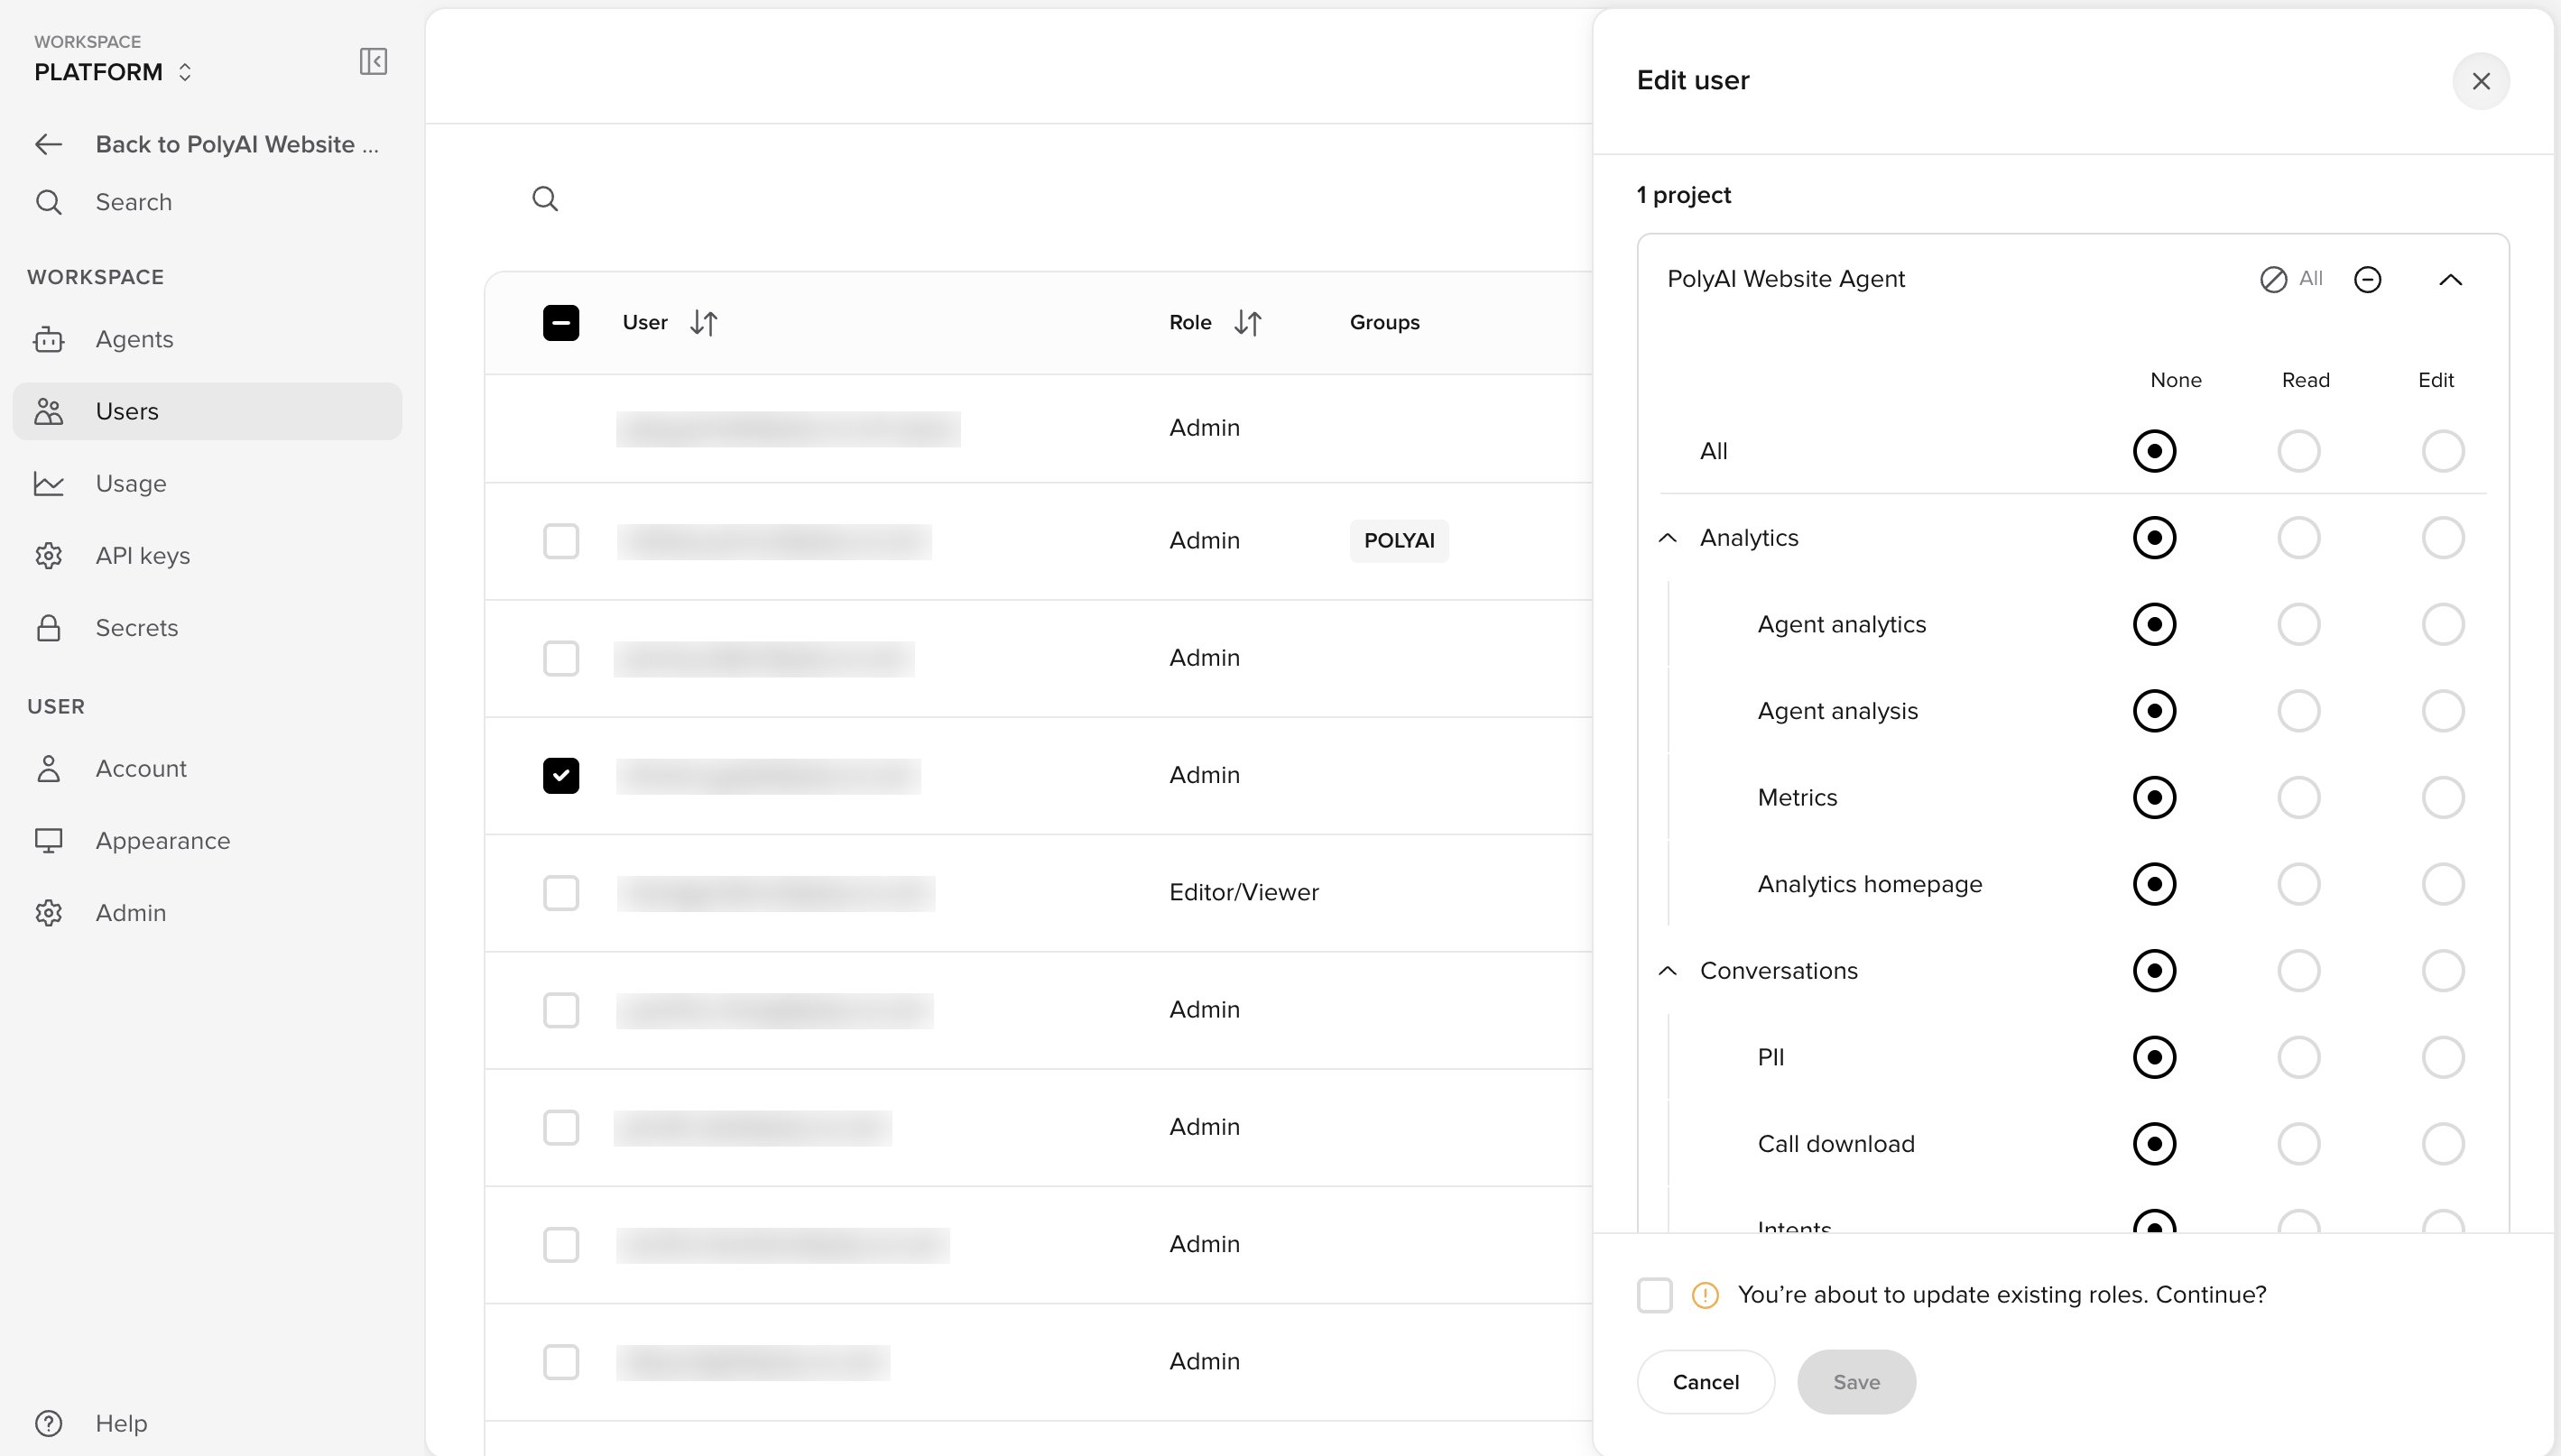
Find the user in the list. Click the ⋮ menu at the end of the row, then click Edit. The Edit user panel opens on the right.
2
Change the role, groups, or projects
Change any of these fields:
- Role: select Admin or Member. If you change the role, Agent Studio clears the project permissions. You must set them again.
- Groups (Optional): add or remove groups.
- Projects: add or remove projects. Click a project row to expand it and change the permission level for each area.
3
Confirm a role change
If you changed the role, a checkbox appears above the buttons. Select the checkbox to confirm that you want to update the role.
4
Save
Click Save.
You cannot edit or delete your own user. Ask another Admin to make changes to your account.
Edit multiple users
You can apply one set of role, groups, projects, and permissions to several users at once.1
Select the users
Select the checkbox at the start of each row. A bar appears at the bottom of the page with the number of selected users.
2
Open the Edit users panel
Click Edit. The Edit users panel opens on the right.
3
Set the new values
Set the role, groups, projects, and permissions. Hold the pointer over an email tag to see that user’s current role and projects.
4
Save
Click Save.
Re-send an invitation
If a user has a Pending or Expired tag, they did not accept the invitation yet.- Click the ⋮ menu at the end of the user’s row.
- Click Re-send invitation.
Delete a user
Deleting a user removes them from the account. They lose access to every project in the account.1
Open the row menu
Click the ⋮ menu at the end of the user’s row, then click Delete.
2
Confirm
Type the user’s email address in the field, then click Delete.
confirm in the field, then click Delete.
Export the user list
Click Export in the top right corner to download the user list as a CSV file. If you typed a search term, the file contains only the users that match the search.Related pages
Add users
Add users, assign a role, and set project permissions.
Role permissions
Reference for every permission area and level.