Lesson 1 of 6 – Create your first project in Agent Studio. This takes about 5 minutes, and the name you choose matters more than you’d think.
Create the agent
1
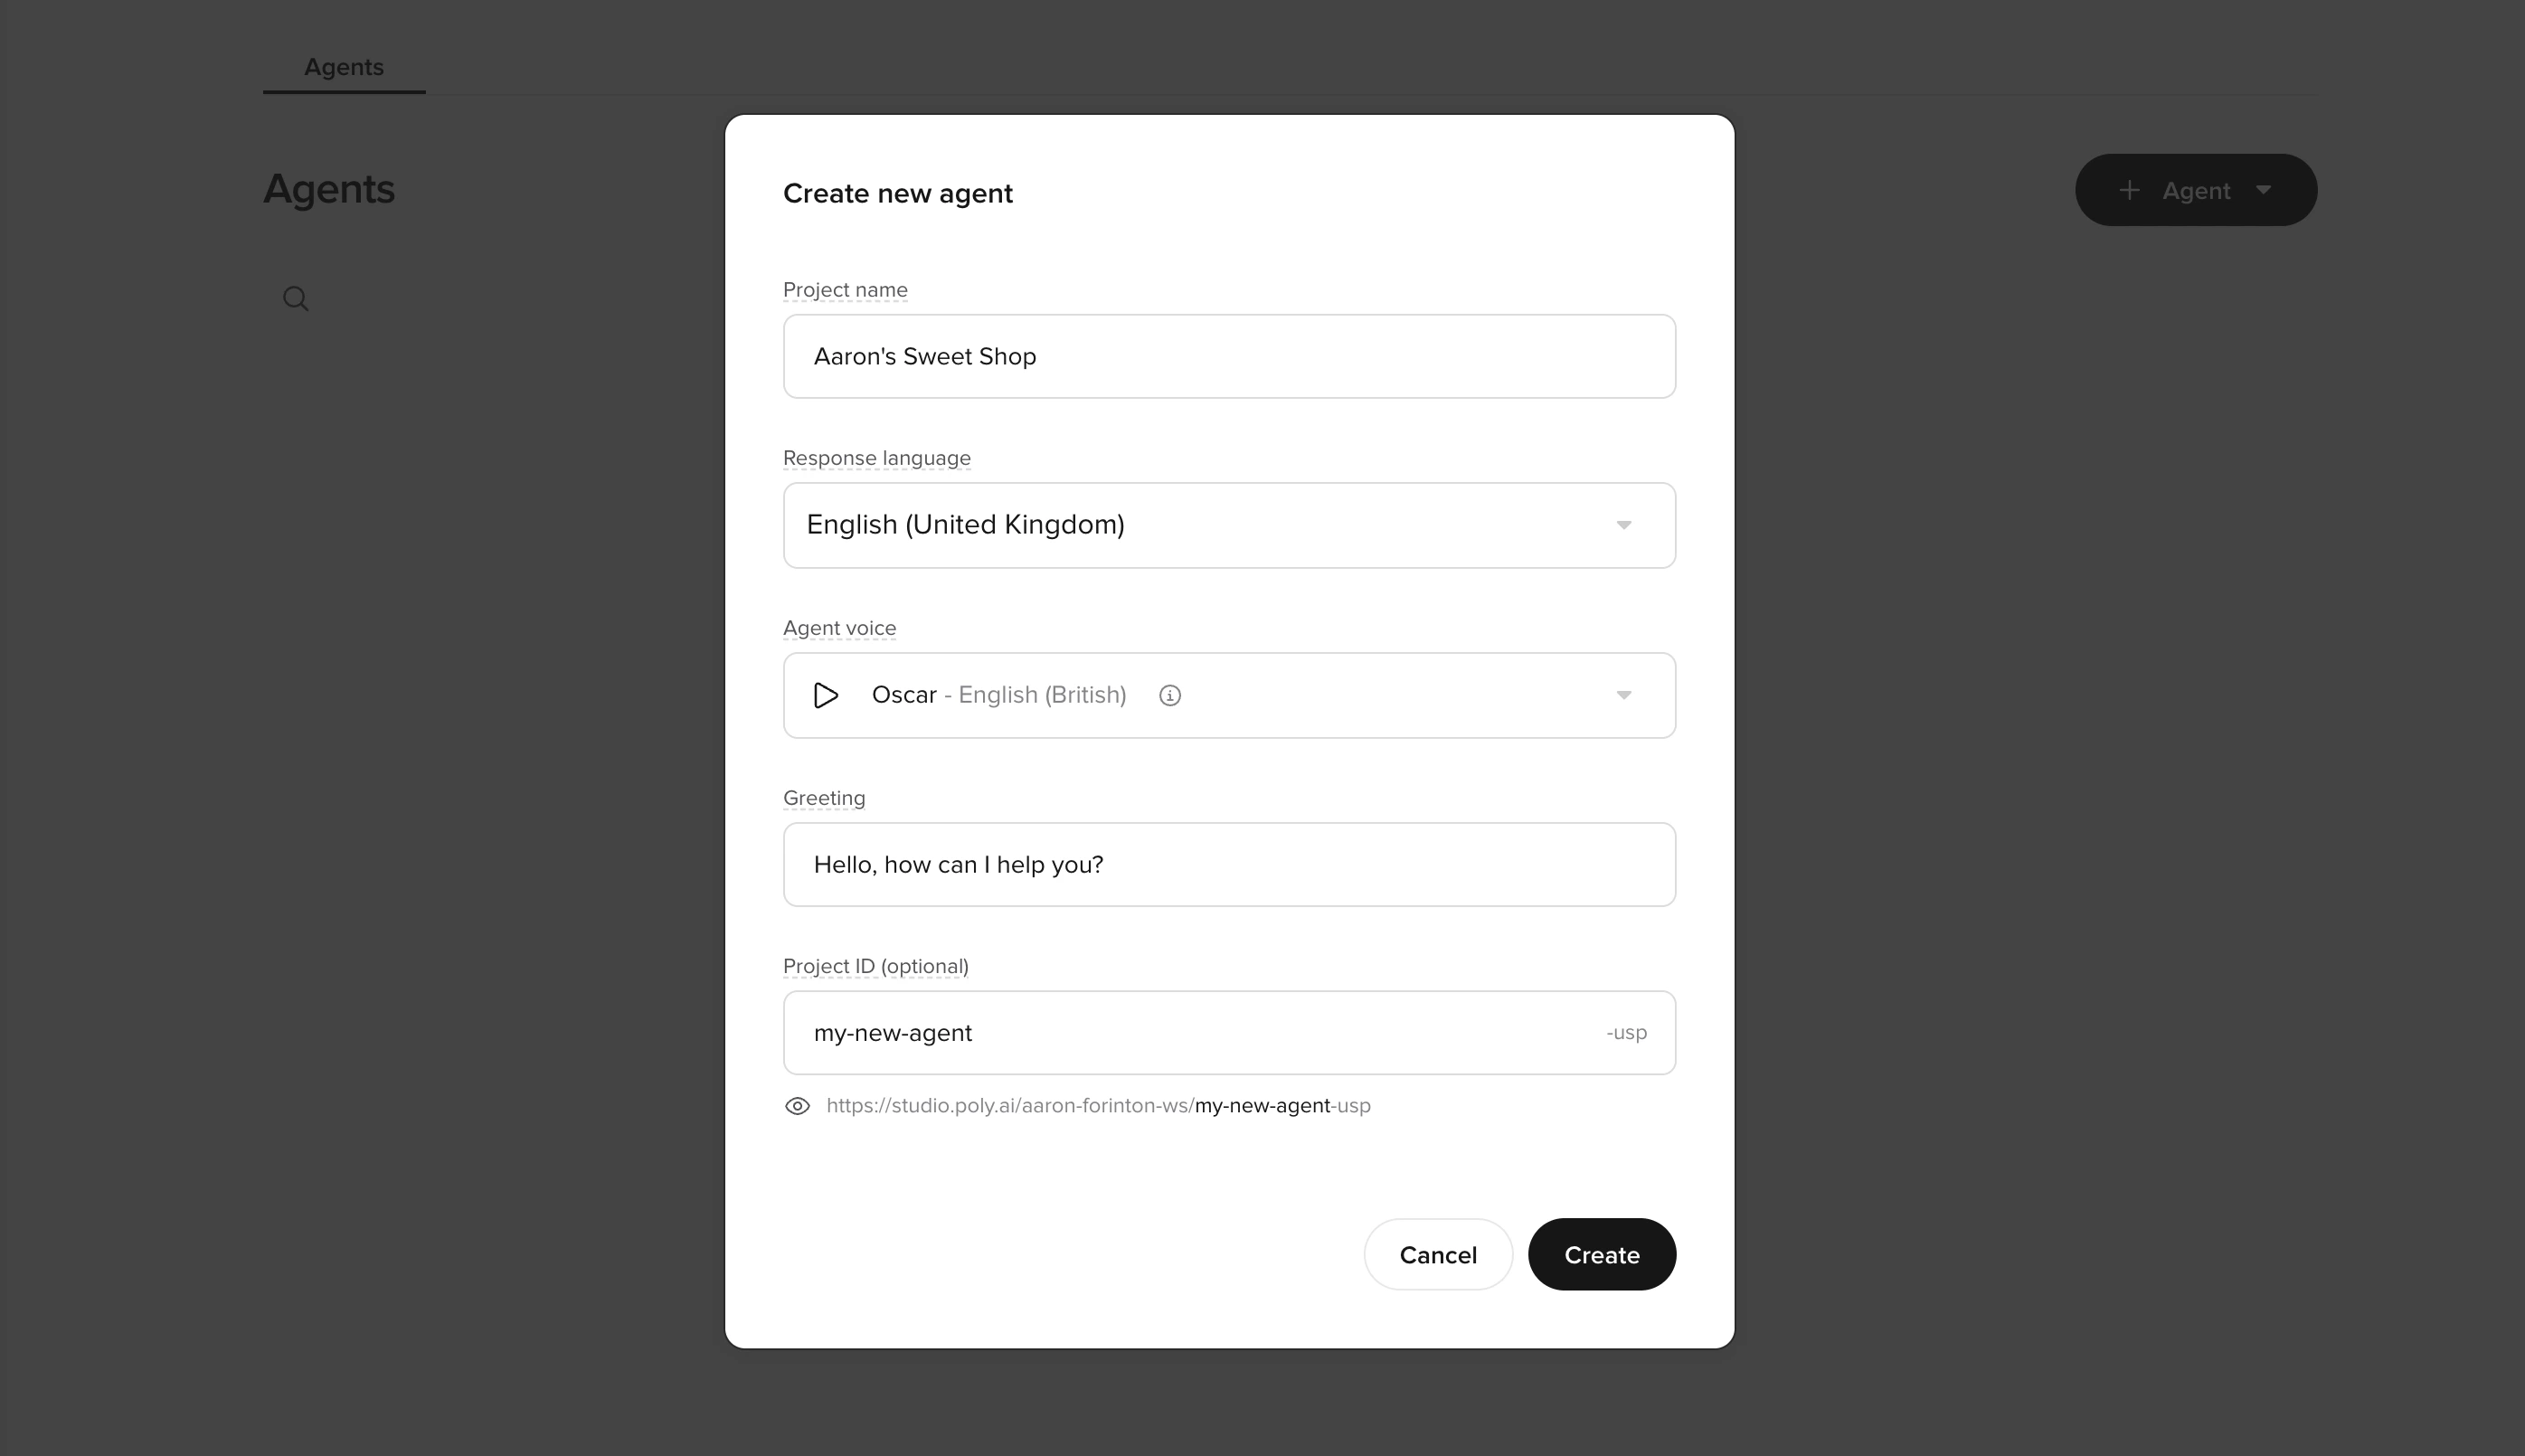
Open the agent creation dialog
Select + Agent to open Create new agent.
2
Configure your agent settings
Fill out the fields carefully (these become your default baseline for all later testing):
Project name
Project name
Use a clear, descriptive name that won’t become misleading later.Good examples:
Acme Support AgentWebchat L1 TriageHotel Concierge (US)
TestNew agent- Names that explicitly reference an environment (
Sandbox,Prod,Live)
Response language
Response language
Select the primary language/locale your users will interact in.
Agent Voice
Agent Voice
Pick a reasonable starter voice. You can always change this later.
Greeting
Greeting
Keep it short and broadly reusable.
- Aim for one sentence that works for both chat and voice
- Example:
Hi–how can I help today? - Avoid over-specific or wordy greetings
Project ID (optional)
Project ID (optional)
Treat this like a stable identifier. It appears in the project URL inside Agent Studio, with an environment suffix appended automatically. If you leave it blank, Agent Studio generates one for you.Allowed characters: alphanumerics and dashes only (
a-z, A-Z, 0-9, -).Examples:my-shop-support-l1hotel-concierge-us
3
Create the agent
Select Create.
Check your understanding
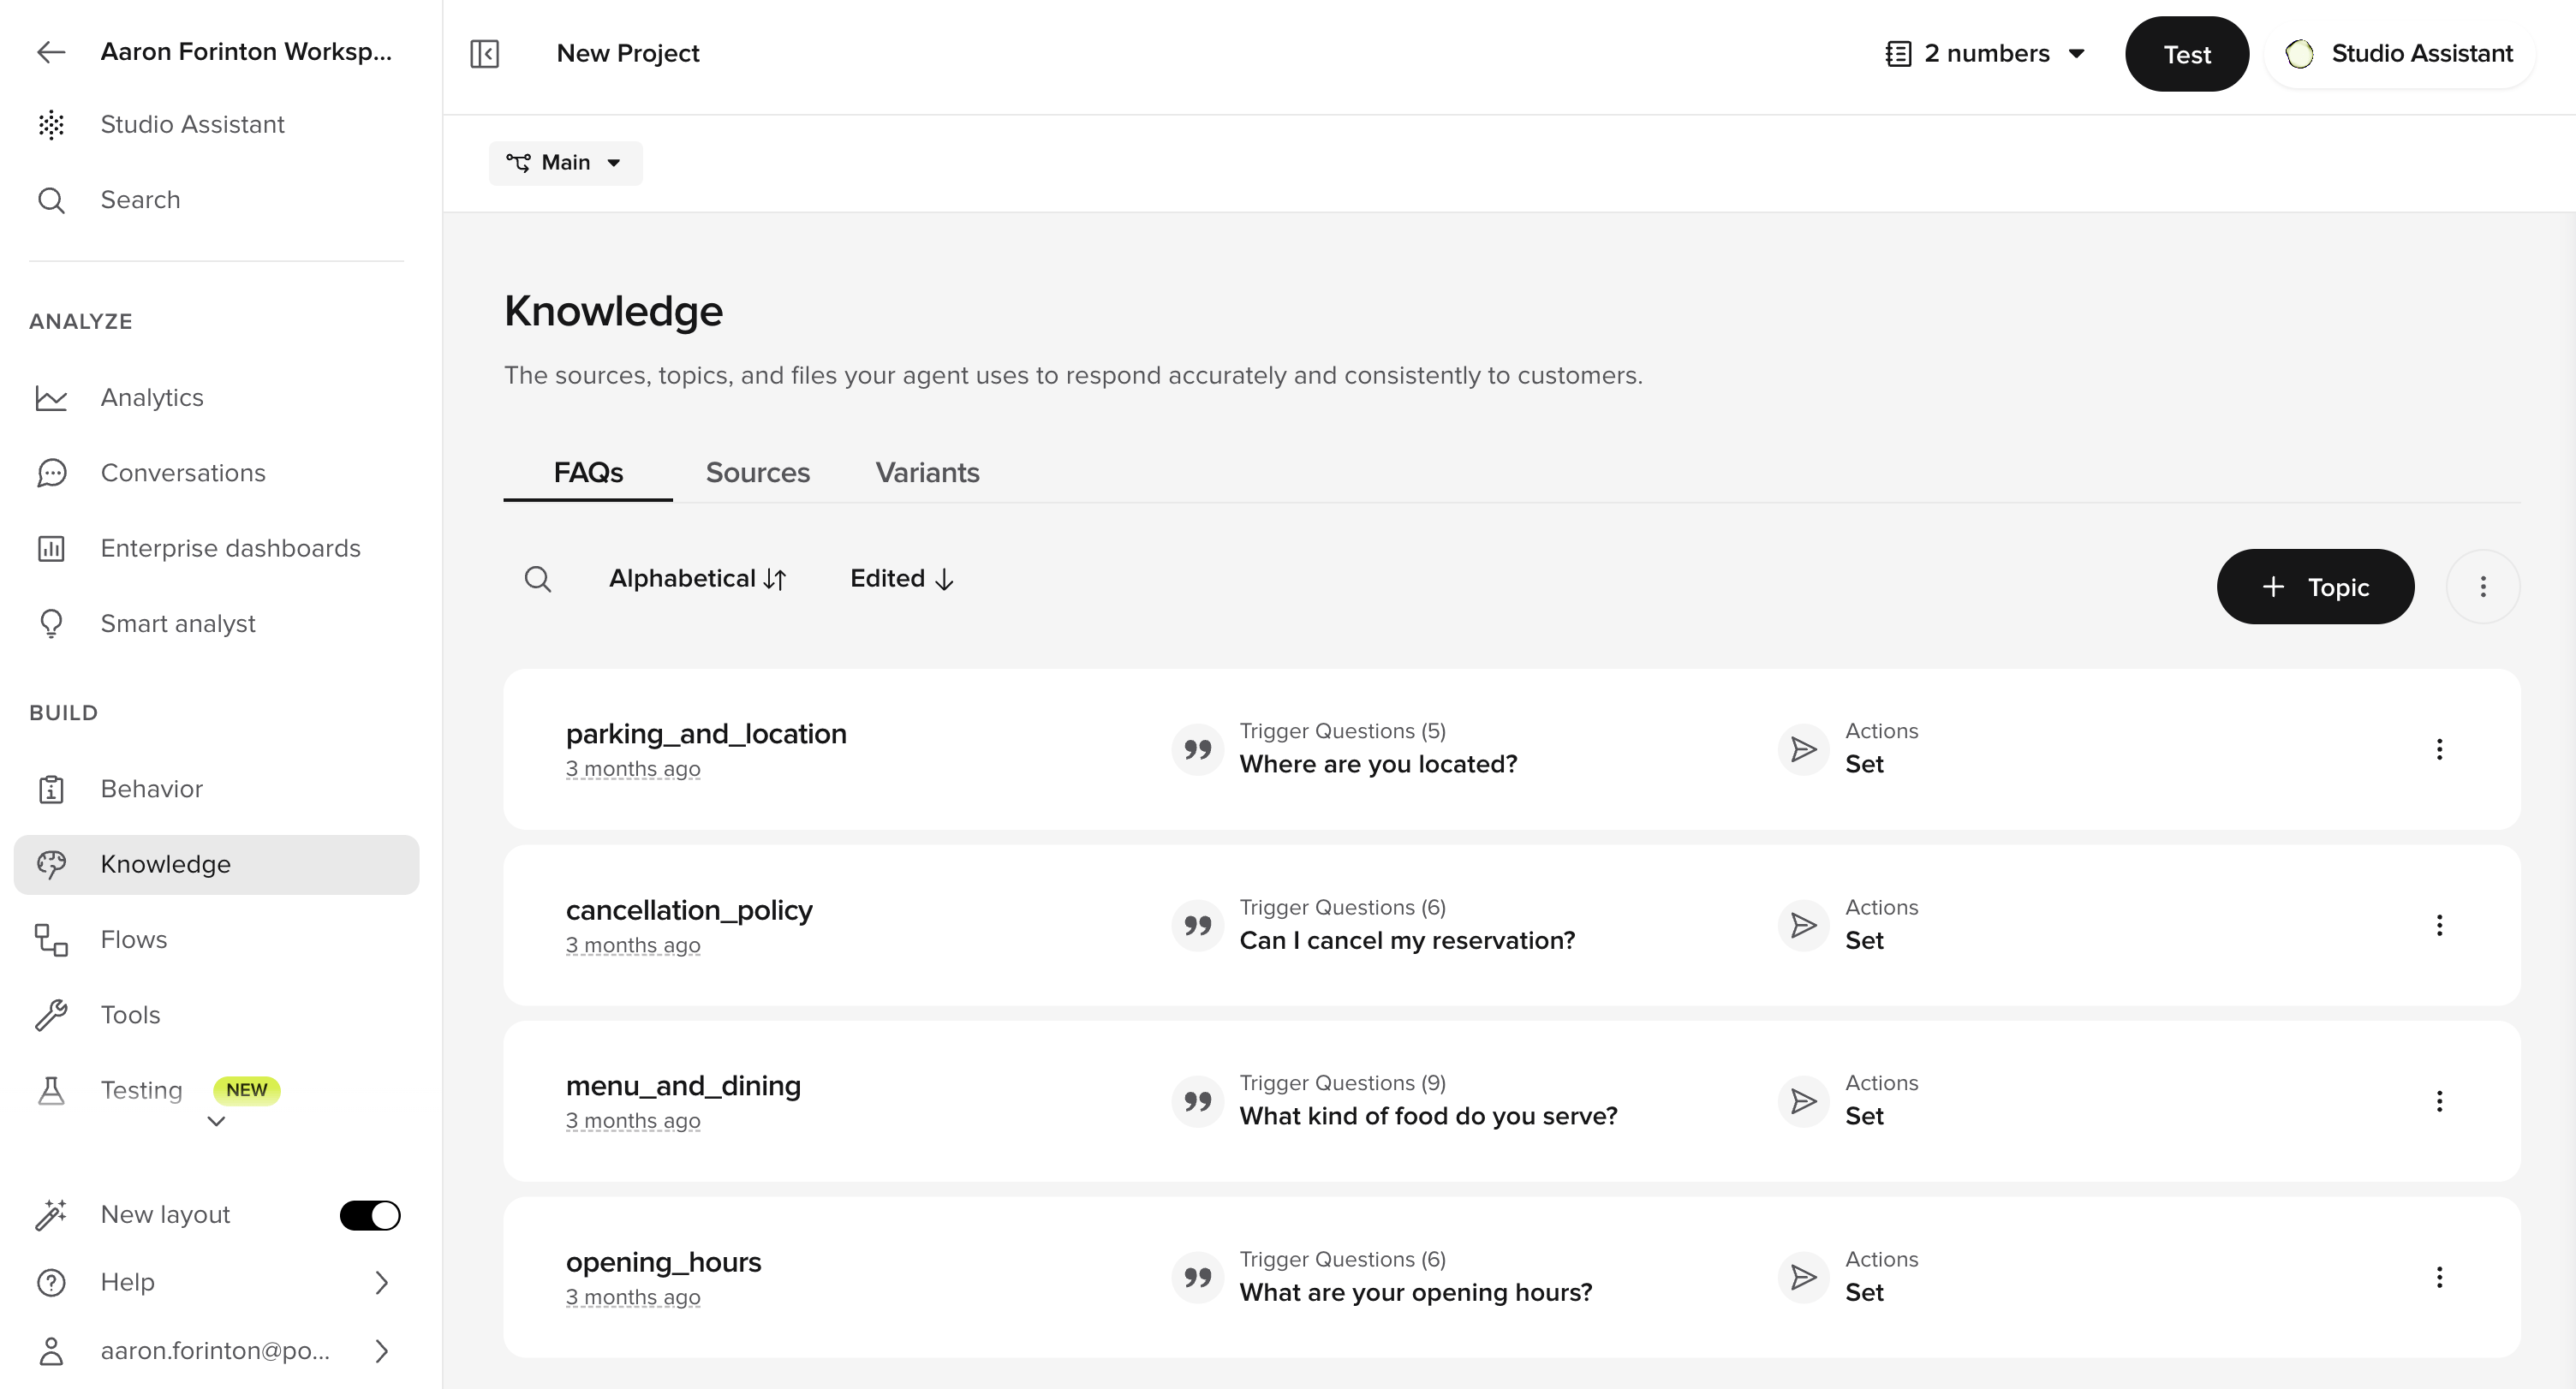
Confirm the baseline workspace
After creation, you land in the Knowledge area – empty state with an Add topic button.Agent Studio interface
Left sidebar
Navigation for all agent configuration areas (Manage, Build, Channels, Configure, Analytics)
Center canvas
Main workspace where you edit topics, functions, flows, and view analytics
Right sidebar
Context-sensitive tools like chat testing, call testing, and version history
Confirm agent identity
Confirm agent identity
- The header shows the agent name and language.
- The agent is in Draft state.
Verify
Success criteria:
- The project loads without errors and stays stable across page changes.
- You can access (at minimum):
- Behavior > General (personality, role, Behavior)
- Knowledge
- Knowledge > Variants
- Voice > Settings
- Deployments
- The Knowledge page shows an empty state with a clear call to action (for example, Add topic), indicating you’re ready for the next steps in the checklist.
Check your understanding
Try it yourself
1
Challenge: Name your agent
You’re building a hotel concierge agent for “The Linden Hotel”. Write out:
- A project name
- A project ID
- A one-sentence greeting
Hint
Hint
The project name should be descriptive but not reference an environment. The project ID should be stable and URL-friendly (lowercase, hyphens). The greeting should work for both chat and voice.
Example solution
Example solution
Project name:
Linden Hotel ConciergeProject ID: linden-hotel-conciergeGreeting: Hi, welcome to The Linden Hotel – how can I help you today?Check your understanding
Go deeper
Want more detail on any of the concepts in this lesson? These reference pages cover the same features in depth:Agent Studio overview
Capabilities overview and UI walkthrough
Quickstart
The shortest path from account creation to a deployed agent
← Back to Level 1
Level overview
Next: Edit agent behavior →
Lesson 2 – give your agent a personality