The Translations page is only visible for multilingual projects with additional languages configured. Translations apply agent-wide – to both voice and chat channels.
When to use translations
Translations are useful when:- Auto-translated phrasing sounds unnatural – for example, “Please hold” auto-translates correctly to British English but “Please bear with me” sounds more natural
- Concepts don’t exist in the target language – for example, “Spell the name” has no direct equivalent in Mandarin or Japanese, so a direct translation sounds unnatural
- Domain-specific terms need precise translations that the LLM gets wrong
- Cultural nuances require different phrasing – extra politeness levels in Japanese, gender-based formality in Hindi or Polish
- Hard-coded utterances in functions need language-specific versions
- Greeting or disclaimer messages need manual translation
How it works
- Create a translation card with the content you want translated
- The card auto-translates to all configured languages on save
- Manually edit any translation that needs improvement – these are marked as “Manually Translated”
- Reference the card in your project using its Translation Key
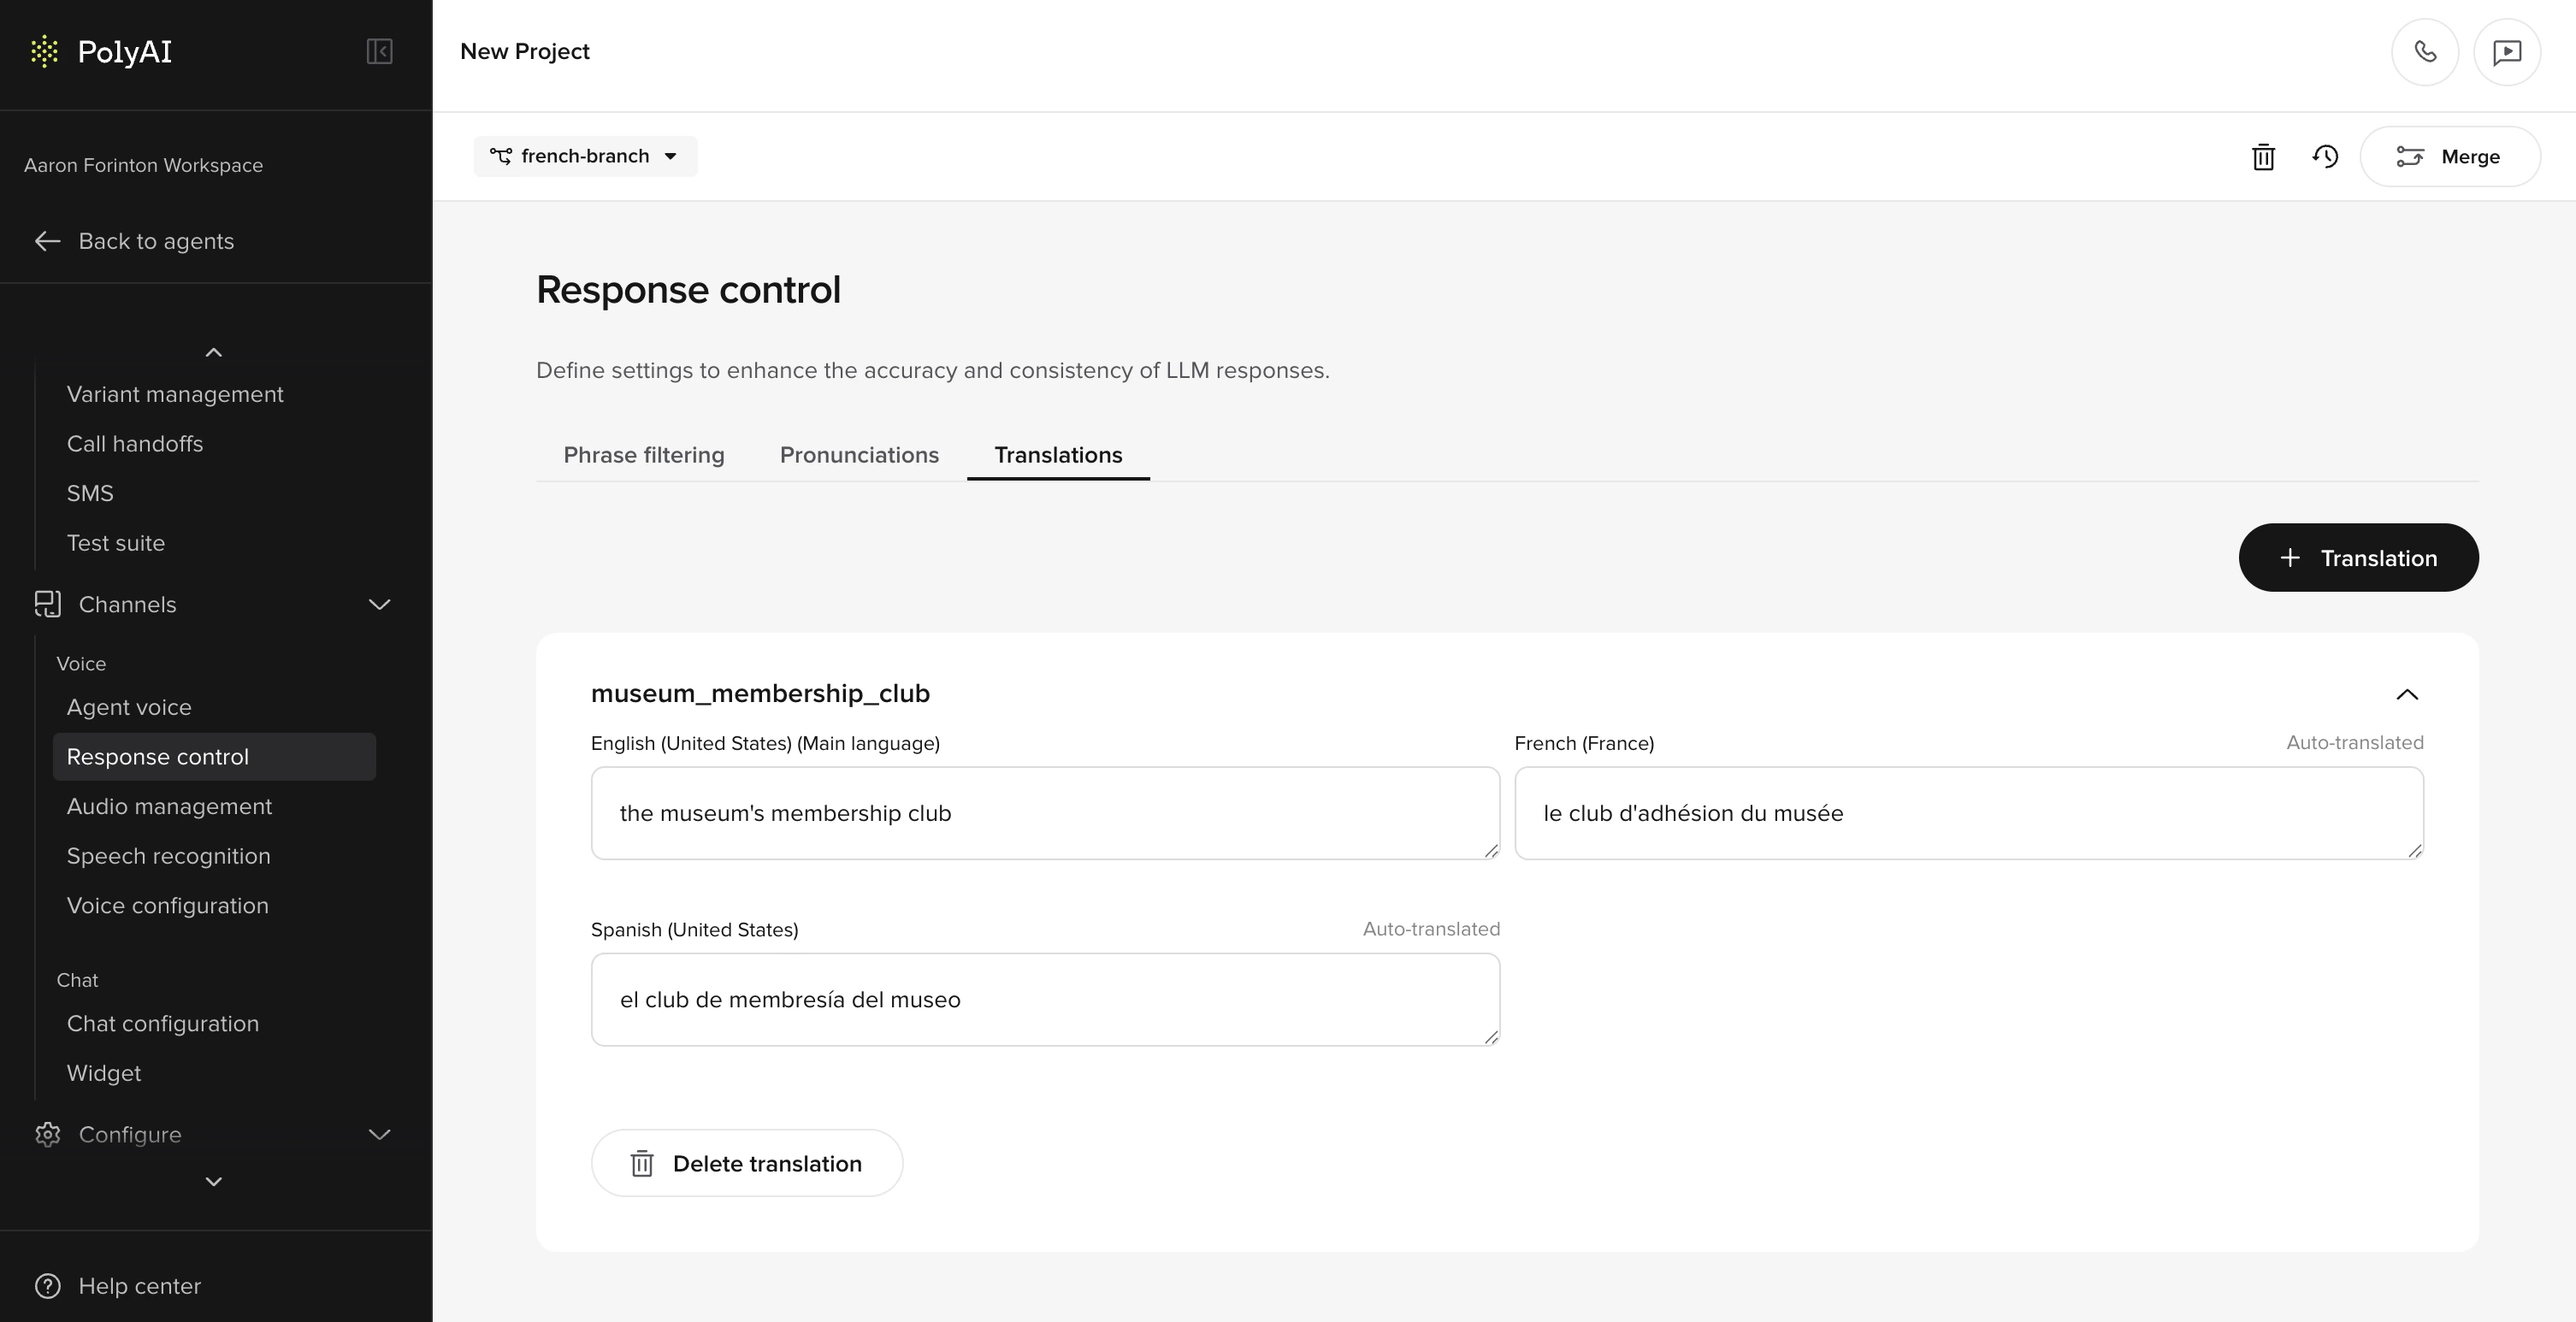
Creating a translation card
- Go to Channels > Response Control > Translations
- Click Add translation
- Enter the content in your main language
- Set a Translation Key – this is how you’ll reference the card elsewhere
- Save – auto-translations are generated for all configured languages
Manually overriding translations
After a card is created, each language shows a status:- Auto-Translated – generated automatically on save
- Manually Translated – you’ve edited the translation for this language
Using translations in your project
In prompts and content
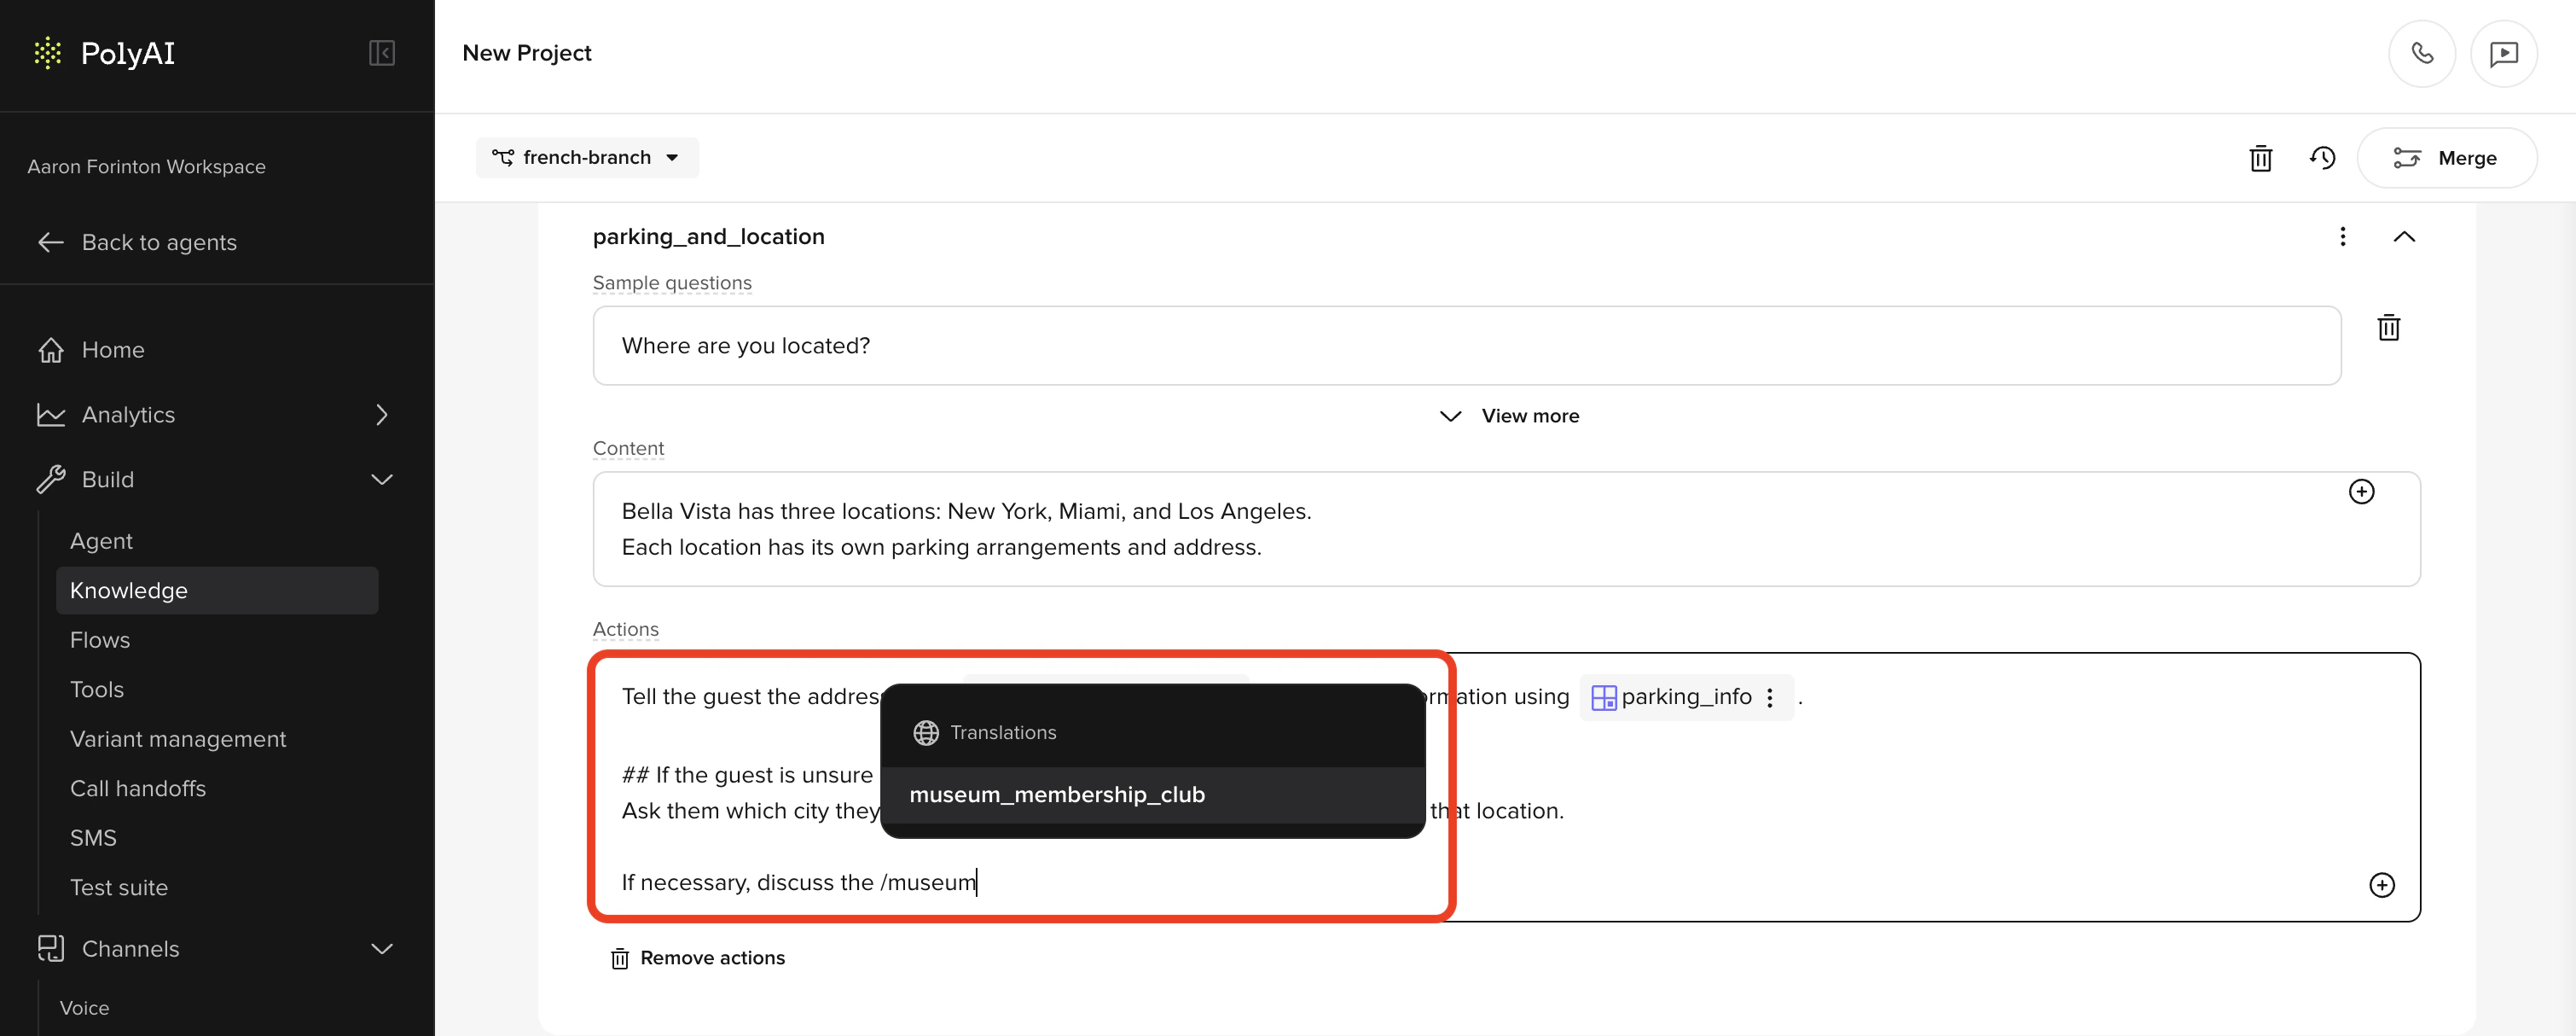
- Greeting and disclaimer messages
- Behavior rules (style guides)
- Prompts in Managed Topics
- Delay control responses
- SMS templates
In functions
For hard-coded utterances in functions, access translations using theconv.translations object:
Language-specific style guides
Translation cards handle specific phrases, but broader behavioral differences across languages are best managed in Behavior rules. Add language-specific style guides to make the agent behave more naturally in each language:- Japanese – extra politeness and honorific language
- Hindi and Polish – gender-based formality
- German – formal “Sie” vs informal “du” based on context
- Spanish – regional variation between Latin America and Spain
<language:xx> tags in behavior rules to scope style guides to specific languages.
Best practices
- Only translate what needs overriding. If auto-translation works, don’t add it to the Translations page.
- Use descriptive translation keys. Keys like
tn_hold_messageare easier to manage thantn_1. - Test with native speakers before going live – auto-translations may be technically correct but sound unnatural.
- Keep the main language content up to date. When you edit the main language text on a card, auto-translations regenerate for languages that haven’t been manually overridden.
Related pages
Pronunciations
Control how your agent pronounces specific terms.
Stop keywords
Block or log specific phrases in agent responses.
Multilingual setup
Configure languages and voices for your agent.