Validate the call experience before embedding anywhere. **Test widget** opens a hosted preview that runs your widget against the selected environment: same agent, same audio path, same call experience as production. Good for internal demos, customer testing, or stakeholder sign-off.
## Open the test widget
1. Open your widget under **Widgets** in Agent Studio.
2. In the right-hand preview panel, click **Test widget ↗**.
3. A new tab opens with a blank page hosting only your widget.
The preview token is valid for **1 hour**. Refresh the test page if it expires.
## Walk through a call
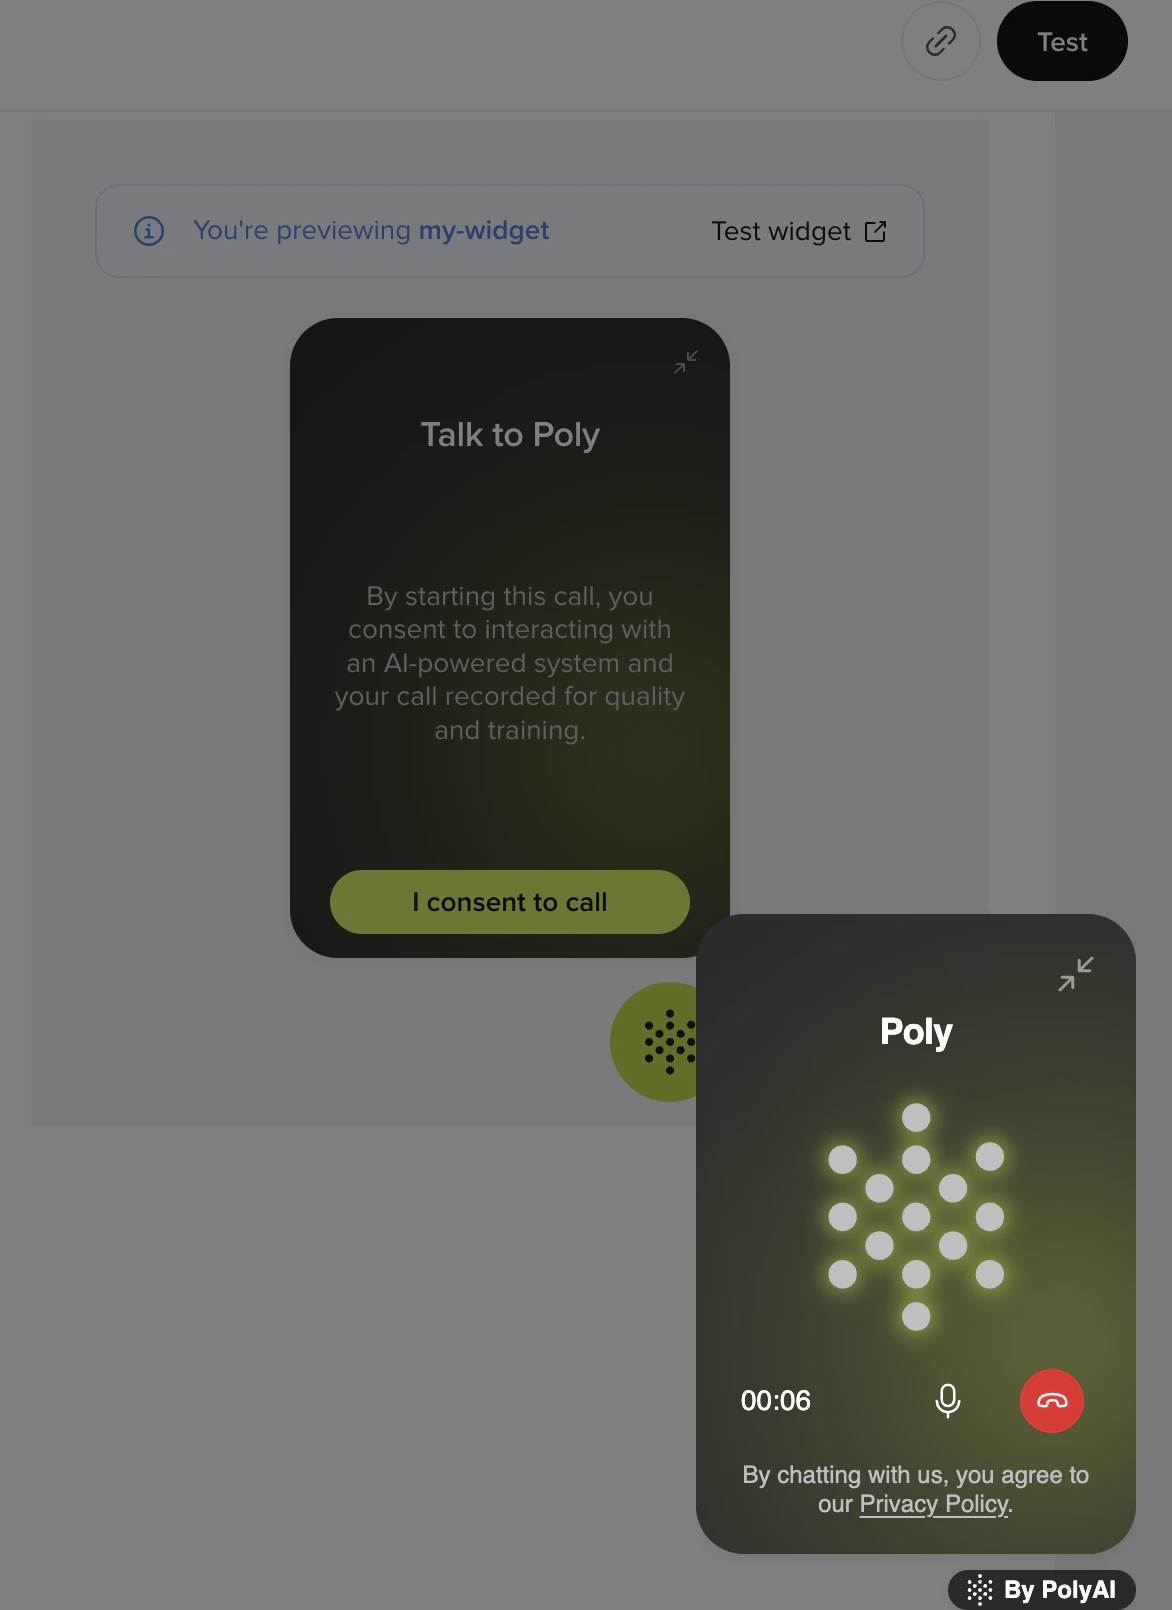
The launcher renders in the bottom-right of the test page. Click to open the widget.
Your welcome message, the disclaimer (if enabled), and a primary **Start call** button using your brand color.
Click **Start call**. The browser prompts for microphone access. Click **Allow**.
The widget shows **Connecting…** while it opens a WebSocket to PolyAI's WebRTC gateway and negotiates audio.
Your agent answers and the widget switches to **In call**. A timer starts and the **Mute** button appears. Speak normally to test the conversation flow.
Click **End call** (or hang up from the agent's side). The widget shows **Call ended** and a **Start new call** button.
## What to check
* **Branding.** Agent name and primary color match.
* **Welcome and CTA copy.** Read out loud to check tone.
* **Disclaimer placement.** Disclaimer appears above **Start call**, with policy links rendered as inline hyperlinks.
* **Audio quality.** Speak and listen for latency, dropouts, or distortion. Web Calling uses Opus 48 kHz stereo.
* **Mute / unmute.** Mute mid-call, confirm the agent can't hear you, then unmute.
* **Call recovery.** Let the call end, then click **Start new call** to confirm clean reconnection.
## Microphone permission
The first time someone clicks **Start call** on a given origin, the browser prompts for mic access:
| Action | What happens |
| ------- | -------------------------------------------------------------------------------------------- |
| Allow | Call connects normally. |
| Block | The widget shows a **Mic blocked** state with steps to re-enable and a **Try again** button. |
| Dismiss | The widget returns to the call-start screen so the visitor can try again. |
The preview runs on a PolyAI origin, so mic permission granted here doesn't carry over to your site.
## Share the preview link
The preview URL is shareable. Send it to colleagues, customers, or your wider team to validate the experience together; no embed required.
A few things to know about how the link behaves:
* The token is valid for **1 hour**. Generate a fresh one from the editor when you need to extend a session.
* Anyone with the link can place a call against the configured environment, so use **Sandbox** for share-outs unless you specifically want stakeholders on production.
* Calls placed via the preview count against your usage just like production calls.
## If the test fails
See [Troubleshooting](/widgets/troubleshooting). The most common issues:
* **Browser blocks microphone.** Check the address-bar lock icon and re-allow.
* **HTTPS required.** The preview is always HTTPS, but if you embed the widget on an `http://` site the launcher is disabled.
* **Stuck on Connecting…** Usually a network/firewall issue blocking WebRTC.
* **No audio after connect.** Check OS-level mic and speaker permissions.
## Next steps
Embed the script on your live site once the test passes.
Mic, network, and call-quality issues.
Validate the call experience before embedding anywhere. **Test widget** opens a hosted preview that runs your widget against the selected environment: same agent, same audio path, same call experience as production. Use it for internal testing, customer demos, or stakeholder sign-off.
Test widget is currently a **Phone widget** feature. Chat widgets use the in-editor live preview to validate styling and copy before publishing.
## Opening the test widget
1. Open your Phone widget in **Widgets**.
2. In the right-hand preview panel, click **Test widget ↗**.
3. A new tab opens with a blank page hosting only your widget.
The preview token is valid for **1 hour**. Refresh the test page if it expires.
## Walking through a call
The launcher renders in the bottom-right of the test page. Click it to open the widget.
The widget shows your welcome message, the disclaimer (if enabled), and a primary **Start call** button using your brand color.
Click **Start call**. The browser prompts for microphone access. Click **Allow**.
The widget shows **Connecting…** while it opens a WebSocket to PolyAI's WebRTC gateway and negotiates audio.
Your agent answers and the widget switches to **In call**. A timer starts and the **Mute** button appears. Speak normally to test the conversation flow.
Click **End call** (or hang up from your agent's side). The widget shows **Call ended** and a **Start new call** button.
## What to verify
* **Branding.** Header text, logo, agent name, and primary color match your brand.
* **Welcome and CTA copy.** Read out loud to check tone.
* **Disclaimer placement.** Disclaimer appears above **Start call**, with policy links rendered as inline hyperlinks.
* **Audio quality.** Speak and listen for latency, dropouts, or distortion. Web Calling uses Opus 48 kHz stereo.
* **Mute / unmute.** Mute mid-call, confirm the agent can't hear you, then unmute.
* **Call recovery.** Let the call end, then click **Start new call** to confirm clean reconnection.
## Microphone permission
The first time a visitor clicks **Start call** on a given origin, the browser prompts for microphone access. Web Calling handles three outcomes:
| Visitor action | Widget behavior |
| -------------- | -------------------------------------------------------------------------------------------------------- |
| Allow | Call connects normally. |
| Block | Widget shows a **Mic blocked** state with steps to re-enable mic permissions and a **Try again** button. |
| Dismiss | Widget returns to the call-start screen so the visitor can try again. |
The preview runs on a PolyAI origin, so mic permission granted here doesn't carry over to your site.
## Sharing a preview
The preview URL is shareable. Send it to stakeholders, customers, or your wider team to validate the experience together, no embed required. Best for internal testing, customer demos, early stakeholder review, and fast validation before website deployment.
A few things to know about how the link behaves:
* The token is valid for **1 hour**. Generate a fresh one from the editor when you need to extend a session.
* Anyone with the link can place a call against the configured environment, so use **Sandbox** or **Pre-release** for share-outs unless you specifically want stakeholders on production.
* Calls placed via the preview count against your usage just like production calls.
## Troubleshooting the test
If the test fails, see [Troubleshooting](/widgets/troubleshooting). The most common issues:
* **Browser blocks microphone.** Check the address-bar lock icon and re-allow.
* **HTTPS required.** The preview is always HTTPS, but if you embed the widget on an `http://` site the launcher is disabled.
* **Stuck on Connecting…** Usually a network/firewall issue blocking WebRTC.
* **No audio after connect.** Check OS-level mic and speaker permissions.
## Next steps
Embed the script on your live site once the test passes.
Mic, network, and call-quality issues.