> ## Documentation Index
> Fetch the complete documentation index at: https://docs.poly.ai/llms.txt
> Use this file to discover all available pages before exploring further.
# How to invite users
> Add team members to your account with role-based permissions.
Add team members to your PolyAI account so they can collaborate on building and managing agents. Only users with the **Admin** role can invite new users.
 ## Invite a user
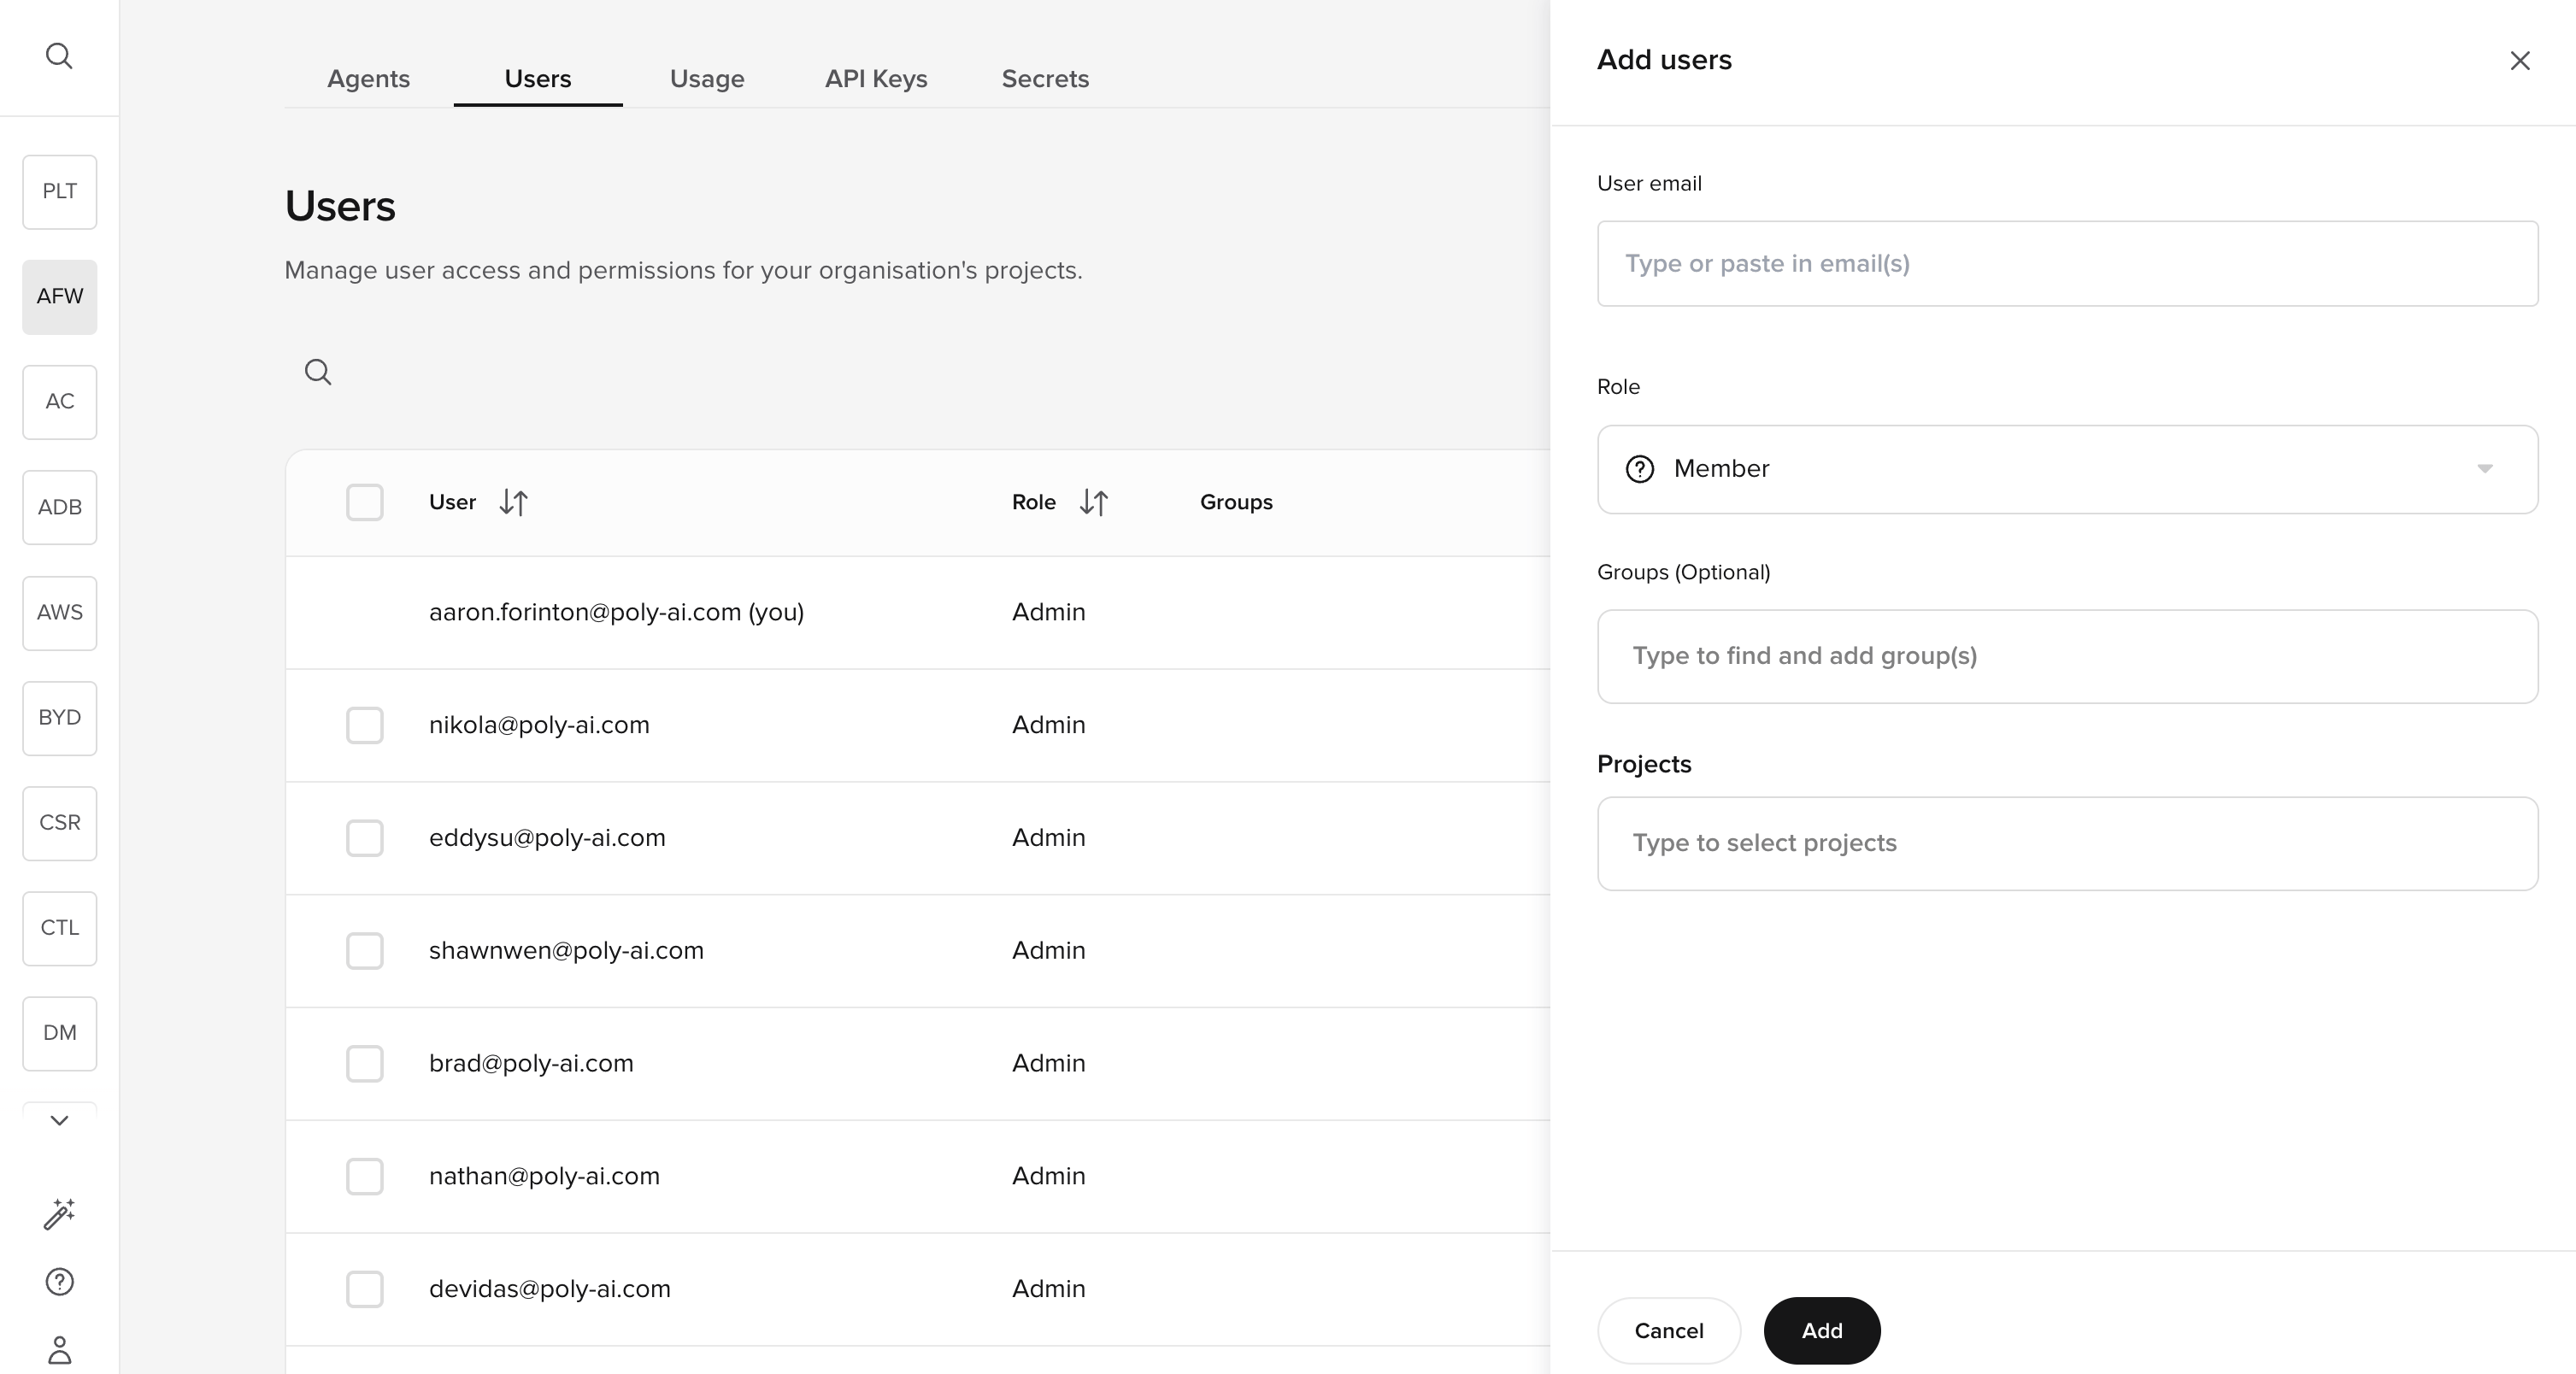
Go to the **Users** tab on the workspace homepage (next to **Agents**, **Secrets**, and **API Keys**).
Click **Add** in the top right corner.
Type one or more email addresses. You can invite multiple users at once by entering each address separated by a comma or pressing Enter.
Choose **Admin** or **Member**:
* **Admin** – Full access to all features, including user management and billing.
* **Member** – Access determined by [granular permissions](/user-management/access-control-scope) you configure after the invite.
If your account uses groups, select which group the new user belongs to.
Click **Confirm**. The invited user does not receive an invitation email automatically. To access the account, they need to go to the [login page](https://app.poly.ai/), enter their email, and click **Forgot password?** to set a password via the reset flow.
After inviting a Member, configure their [permissions](/user-management/access-control-scope) to control which areas of Agent Studio they can access. If a Member is not assigned to any projects, they will see a "Page not found" screen when they log in – make sure to assign at least one project after inviting them.
## Invite a user
Go to the **Users** tab on the workspace homepage (next to **Agents**, **Secrets**, and **API Keys**).
Click **Add** in the top right corner.
Type one or more email addresses. You can invite multiple users at once by entering each address separated by a comma or pressing Enter.
Choose **Admin** or **Member**:
* **Admin** – Full access to all features, including user management and billing.
* **Member** – Access determined by [granular permissions](/user-management/access-control-scope) you configure after the invite.
If your account uses groups, select which group the new user belongs to.
Click **Confirm**. The invited user does not receive an invitation email automatically. To access the account, they need to go to the [login page](https://app.poly.ai/), enter their email, and click **Forgot password?** to set a password via the reset flow.
After inviting a Member, configure their [permissions](/user-management/access-control-scope) to control which areas of Agent Studio they can access. If a Member is not assigned to any projects, they will see a "Page not found" screen when they log in – make sure to assign at least one project after inviting them.